In this article we will explore the serenity and grace of Pigeon Pose in yoga, this pose is also known as ‘Kapotasana‘ in the Sanskrit language.
This pose is one of the basic ‘Hatha yoga’ poses, here we will understand its meaning, exploring its basic details, and unraveling its numerous benefits.
You will also gain the knowledge and confidence to incorporate this Pose into your yoga practice.
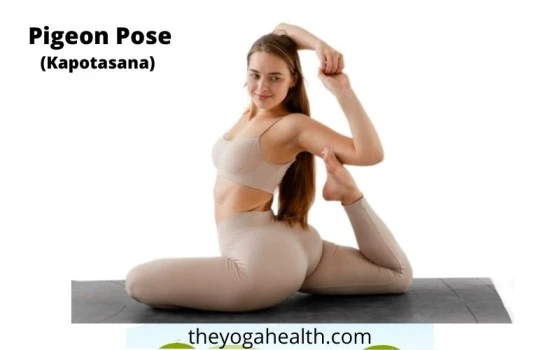
Table of Contents
Pigeon Pose (Kapotasana)
Pigeon Pose in yoga, or Kapotasana, is a deeply grounding and restorative yoga posture that opens the hips and releases tension stored in the body. With its resemblance to the graceful posture of a pigeon, this asana symbolizes surrender, peace, and the ability to let go.
By practicing this Pose, you can tap into a sense of emotional and physical release, nurturing a profound connection with your inner self.
Meaning of the Pigeon Pose
Pigeon Pose represents a harmonious balance between strength and surrender. Just as a pigeon coexists peacefully with its surroundings, this pose invites you to embrace the present moment, accepting both the challenges and joys that come your way.
This Pose encourages inner serenity, acceptance of oneself, and the willingness to release tension and resistance.
Basic Pigeon Pose in Yoga:
To perform basic Pigeon Pose, begin in a tabletop position with your hands and knees on the ground. Take your right knee forward and place it behind your right wrist. Now slide your right foot towards your left hip.
Straighten your left leg back, aligning it with your body. Find a comfortable position for your right foot, keeping it flexed to protect your knee. Gently lower your upper body onto your forearms or a bolster, maintaining a long spine.
Breathe deeply and evenly, allowing your body to relax and surrender into the pose. Most of us just refer to this as a pigeon. When standing, try to avoid shifting your weight to one side. Take a forward fold to increase the stretch and add a little pressure on your front leg.
Basic Details
| Sanskrit Name | Kapotasana |
| English Name | Pigeon Pose |
| Position | Prone |
| Difficulty Level | Intermediate |
You May Also Like: Paschimottanasana (Seated Forward bend Pose)
Pigeon Pose Benefits:
- Hip Opening: This Pose provides a deep stretch to the hip flexors and external rotators, promoting increased flexibility and mobility in the hips.
- Improved Posture: By releasing tension in the hips, This Pose helps align the pelvis and spine, improving overall posture and reducing lower back pain.
- Stress Relief: The forward fold aspect of this Pose creates a calming effect on the nervous system, reducing stress, anxiety, and tension in the body.
- Emotional Release: This Pose is known for facilitating the release of stored emotions and energy, allowing for emotional healing and inner peace.
Benefits in Following Ailments: Healing Through Pigeon Pose
Sciatica: This Pose can alleviate sciatic nerve pain by stretching and releasing tension in the hips and lower back.
Tight Hips: Regular practice of this Pose helps loosen tight hip muscles and connective tissues, promoting an increased range of motion and flexibility.
How to Do Pigeon Pose: Step-by-Step Instructions for Beginners
- To get started, assume a tabletop position on the floor. Place your hands firmly beneath your shoulders and position your knees directly under your hips.
- Take the next step by gently walking your hands forward until you feel a comfortable stretch. Then, spread your fingers wide while pressing both palms firmly onto the mat.
- Begin by tucking your toes and gradually lift your hips towards the ceiling. Straighten out your arms and also make sure to keep your shoulders away from your ears.
- Ensure your feet are hip-width apart with slightly bent knees.
- Now, extend your left leg upward until you have formed a straight line from your head to your heel. Once you have achieved this alignment, sweep your left leg down behind both hands while simultaneously lowering your right knee onto the ground beside them.
- Place your left knee just behind your wrist and let your left toes rest alongside the other foot!
- Gently lower your buttocks to the floor while extending your right leg behind you, placing the top of your right foot flat on the ground.
- Lift both hands off the floor, so only your fingertips are touching it. Make sure to keep all three points – left toes, right hand, and extended leg – aligned.
- Hold this pose for a few moments while maintaining focus on the ground between your fingertips. Keep your spine elongated and ensure that your pelvis remains cantered throughout the duration of the pose.

One-Legged King Pigeon Pose (Eka Pada Rajakapotasana)
The commonly known Basic Pigeon pose is essentially a preparation for the full pose known as Eka Pada Rajakapotasana, meaning One Legged King Pigeon Pose. In this back leg is bend in the full posture, and both hands extends up and over the shoulders to grab hold of the back foot.
To allow the back foot to go toward the crown of the head, the spine extends deeply. It is a somewhat complex position that calls for open shoulder, deep back bending and balance in addition to open hips.
How To Do One-Legged King Pigeon Pose (Eka Pada Rajakapotasana)
Transitioning from Mermaid pose, follow these steps to achieve a deeper stretch and open up your chest and shoulders:
- Release your overhead grip but keep your left foot in the crook of your left elbow. Hug your foot in towards your left buttock.
- Now, reach your right arm across the front of your chest and grab the toes of your left foot with your right hand. Simultaneously, raise your left arm up towards the ceiling as you turn your chest towards the front of the mat.
- Bend your left elbow and drop your left hand over your shoulder and behind your back. This allows you to reach your left toes with your left hand.
- Release your right hand and extend it towards the ceiling. Bend your right elbow to drop your right hand behind your back, reaching for your left toes. Ideally, your arms should be in a symmetrical position: elbows pointing towards the ceiling, hands dropped behind your back while holding the left foot.
- If this is too challenging, you can use a strap over the left foot and hold it with both hands for support.
- In this position, open your chest and throat towards the ceiling. Extend the crown of your head back towards your left foot, maintaining a lengthened spine.
You May Also Like: Bridge Pose (Setu Bandhasana)
Pigeon Pose Variations:
When you become comfortable with the basic Pigeon Pose and you are able to do the pose very easily then you can explore the following variations of this pose:
- Reclined Pigeon Pose: This is a tougher variation of the pose. To start you have to lie on your back and cross your right ankle over your left knee. Draw your left knee towards your chest, holding behind your thigh or shin. This variation provides a gentler hip stretch.
- King Pigeon Pose: From basic Pose, bend your back leg and reach your hand back to hold onto your foot. Gently bring your foot towards your head, deepening the hip opening and chest expansion.
- Resting Pigeon Pose: In this variation, from basic pose you have to extent your arms fully up in the air and then slowly you have to bend forward and place your forehead on the ground. Your hands will remain fully extended and flat on the ground. This pose will give extra stretch to your lower back.
- Revolved Pigeon Pose: In this pose you have to give a twist to your upper body towards your right side and have to hold toe of your left bent leg with your right hand. Your left hand will be on the ground to help in your twist from your hip towards right side.
- Raised Hands Pigeon Pose: In this Variation, you have to raise both of your hands over your head and move then backwards as far as you can, while keeping your arms straight. You will move your chest and head back as far as you can. This pose will give extra stretch to your back and hips and will help you to achieve King Pigeon Pose.
- Pigeon Pose on Perch: Place a block or blanket below the front leg to help square off the hips which will keep the lumbar spine better into the line and will not place any excessive stress on the joints.
- Standing Pigeon On Chair: In this pose you have to place your folded front leg on the table top in a standing position. Make sure to repeat with your other leg to get the full benefit out of this pose variation.
- Mermaid Pigeon Pose: By including a backbend, shoulder stretch, and quad stretch, Mermaid moves you one step closer to Full Pigeon. Mermaid serves as a good entrance point and actually directs you towards into Full Pigeon. For those with tight shoulders, a strap is very practical.
In the picture below all the different Pigeon Pose Variations are shown:

For Beginners:
If you are new to Pigeon Pose then, it is important to approach this pose with patience and respect for your body’s limitations. Start with the basic pose and gradually deepen the stretch as your body becomes more flexible.
Use props such as blankets or blocks to support your body and maintain proper alignment. Remember to listen to your body’s signals and avoid any sharp or intense pain.
How to Do Pigeon Pose Safely: Precautions and Alignment Tips
To practice this Pose safely and effectively, consider the following precautions and alignment tips:
Warm-up: Prior to attempting this Pose, warm up your body with gentle hip-opening exercises and stretches to prepare your muscles and joints.
Knee Alignment: Pay attention to the alignment of your front knee, ensuring that it remains in line with your ankle and does not strain or twist.
How Much Time to Do Pigeon Pose:
The duration of this Pose can vary depending on your comfort level and flexibility. When you are new to this pose, you can try to hold this pose for 1 to 2 minutes on each side of your body.
When your confidence increases, gradually you can increase the time of the pose as your body becomes more accustomed to the stretching of the pose. Remember to breathe deeply and relax into the pose, allowing your body to release tension.
Precautions:
Although Pigeon Pose is generally safe for most individuals, yet it is important to consider the following precautions:
Knee Injuries: If you have a knee injury or pain, approach this Pose with care or you can also seek guidance from a qualified yoga instructor for necessary modifications in the pose according to your comfort levels.
Recent Hip or Pelvic Injuries: Individuals with recent injuries to the hip or pelvis should avoid or modify this Pose to prevent further discomfort or strain.
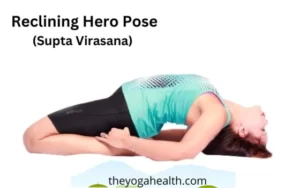
You May Also Like: Reclining Hero Pose (Supta Virasana)
Contraindications: When to Avoid
This Pose is not recommended for individuals with the following medical conditions:
Knee Injuries: If you have any knee injury or chronic knee pain, it’s best to avoid this Pose to prevent exacerbating the condition.
Sacroiliac Joint Dysfunction: Individuals with sacroiliac joint dysfunction should avoid or modify this Pose to prevent discomfort or instability.
Tips to Enhance
Use Props: Place a bolster or folded blanket under your hips to provide support and elevate your pelvis, allowing for a deeper stretch and relaxation.
Focus on Breath: As you settle into this Pose, direct your attention to your breath, inhaling and exhaling deeply to facilitate a sense of release and surrender.
Conclusion Pigeon Pose In Yoga:
Pigeon Pose in yoga is a beautiful and restorative yoga posture that offers a wide range of physical and emotional benefits. By incorporating this Pose into your practice, you can open your hips, release tension, and cultivate a sense of peace and surrender.
Do your think this Pose is really a good pose that you would like to include in your Yoga routine, kindly mention so in the comments section below?
FAQs Pigeon Pose In Yoga:
Q1: Is Pigeon Pose suitable for beginners?
A: Yes, Pigeon Pose can be done by beginners, but it might be a bit challenging at first. It’s essential to practice with patience and listen to your body. If you find it difficult to lower yourself down, you can use props like a cushion or a folded blanket for support.
Q2: Can Pigeon Pose help with back pain?
A: Pigeon Pose can be beneficial for relieving tension in the lower back. It can help by opening the hips and stretching the hip flexors and ease the strain on the lower back muscles. But, if you have severe back pain or any injuries, it’s best to consult with a healthcare professional before attempting the pose.
Q3: Can Pigeon Pose help with tight hips?
A: Absolutely! Pigeon Pose is renowned for its hip-opening benefits. By stretching and releasing tension in the hip flexors and outer hips, it can greatly improve hip flexibility and alleviate tightness.
Q4: Can Pigeon Pose be practiced during pregnancy?
A: Pigeon Pose should be practiced with caution during pregnancy. If you are pregnant, it’s advisable to avoid deep backbends and twists. Consult with a prenatal yoga instructor or a healthcare provider for safe modifications.
Q5: Can I do Pigeon Pose if I have knee pain?
A: If you have knee pain or any knee injuries, it’s essential to approach this Pose with caution. Consider using props, like a cushion or a folded blanket, to provide support and reduce pressure on the knees.
Q6: How often should I practice Pigeon Pose?
A: The frequency of practicing this Pose depends on your comfort level and experience. You can do it as part of your daily yoga routine or as directed by your yoga instructor. In any case a few times a week you can do this pose for full benefits.
Q7: Can Pigeon Pose improve my posture?
A: Yes, this Pose can help improve posture by stretching the hip flexors and strengthening the core muscles. Better posture can lead to reduced strain on the spine and improved overall alignment.
Q8: How can I modify Pigeon Pose if I find it challenging?
A: If you find this Pose challenging, you can use props like cushions or folded blankets for support. Alternatively, you can try the Reclining Pigeon Pose (Supta Kapotasana) as a gentler variation.
Q9: Can I hold my breath while in Pigeon Pose?
A: No, it’s essential to maintain steady and even breathing while in this Pose. Focus on deep inhalations and exhalations to relax your body and enhance the stretch.
Q10: Can Pigeon Pose help with sciatica pain?
A: This Pose is known to be therapeutic for sciatica as it stretches the hip flexors and glutes, which can alleviate pressure on the sciatic nerve.
However, if you have severe sciatica pain or any medical condition, consult with a healthcare professional before attempting the pose.
Q11: Can Pigeon Pose help with tight groin muscles?
A: Yes, this Pose can be beneficial for stretching and releasing tension in the groin muscles. The hip-opening aspect of the pose helps in improving flexibility and relieving tightness.
Q12: Can I practice Pigeon Pose during menstruation?
A: Some women may find this Pose beneficial during menstruation, as it can help alleviate discomfort in the pelvic region. However, listen to your body and avoid deep backbends if they cause any discomfort.
Do share your experience of doing Pigeon Pose, it will definitely help other readers as well and if You have any question or comments regarding this Pose, you can mention so in the comments section below.