The Shoulder Stand or Salamba Sarvangasana is one of the greatest asana introduced to humanity by our sages. Sarvangasana is considered the mother of all asanas. As a mother always tries to keep happiness and harmony in the home so does this asana in the human body.
Several organs and glands in the human body need proper blood flow and nutrients. The glands secrete hormones for the proper functioning of the human body.
If the glands fail to function properly, they cannot produce the hormones they should produce. Shoulder Stand is the most important asana of ‘Hatha Yoga’ which improves the functioning of the glands in the human body.
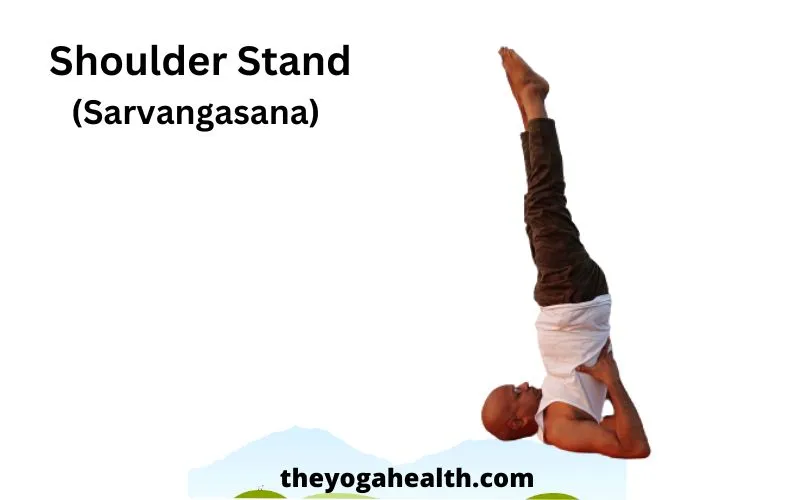
Table of Contents
Shoulder Stand (Salamba Sarvangasana)
‘Alamba’ in the Sanskrit language means ‘Support’ and along with ‘Sa’ ‘Salamba’ means ‘Supported’ or ‘Propped up’.
‘Sarva’ in the Sanskrit language means, ‘all’ or ‘entire’ and ‘ang’ means ‘limb’ or ‘body’, so ‘Sarvang’ means the ‘whole body’ or ‘all the limbs’. In this pose, the entire body is benefitted from the asana, therefore this name.
Shoulder Stand Yoga Details
| Sanskrit name | Salamba Sarvangasana |
| English name | Shoulder Stand pose |
| Other name | Sarvangasana |
| Difficulty level | Intermediate |
| Type | Stretch |
| Position | Upside down on shoulders |
Shoulder Stand (Sarvangasana) Benefits The Following Muscle:
- Upper back
- Middle Back
- Core muscles
- Neck
- Arms
- Shoulders
Shoulder Stand Benefits
Many asanas make a direct impact on the glands and make them function properly, Sarvangasana is one of them.
- This is one of the most important asana that makes a direct impact on the thyroid and parathyroid glands, which are situated in the neck area.
- The person suffering from asthma, bronchitis, and other throat ailments gets relief by practicing this asana.
- Extremely helpful in Headaches, migraines, and insomnia, even chronic headaches may disappear with regular practice.
- Regular practice of this asana eradicates common cold and other nasal disorders.
- People suffering from short temperedness, nervous breakdown, hypertension, and diabetes are relieved.
- The change in the body’s gravity affects the organs of the stomach resultantly bowels move freely and constipation disappears. As a result toxins are removed from the body and energy is increased.
- This asana is recommended for urinary disorders, uterus displacement, menstrual troubles, piles, and hernia.
- It also relieves epilepsy, low vitality, and anemia.
- Regular practice of this asana will increase vigor, strength, and life becomes peaceful and happy.
- After a long illness regular practice of this asana brings back lost vitality.
- This asana activates abdominal organs, relieves stomach and intestinal ulcers.
- Sarvangasana along with Sirsasana works wonderfully for eyesight and hair growth. The regular practice of these two asanas will keep proper vision even till your old age.
Shoulder Stand Steps For Beginners
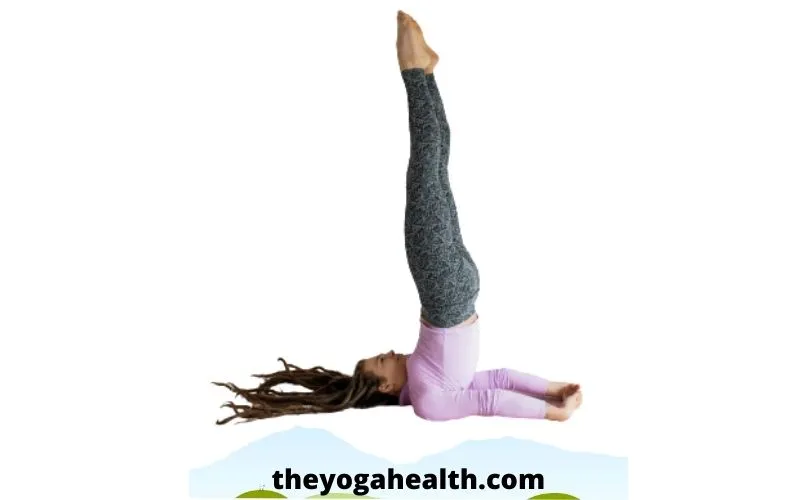
1. Lie down flat on your back on the yoga mat keeping your legs stretched out and tightened at the knees, place your hands by the side of your legs, palms facing down. Now take a few deep breaths.
2. Now breathe out and bend your knees and move your legs towards your stomach till your thighs press it. Now take two breaths.
3. Raise your hips from the floor while breathing out and keep your hands on them by bending your arms at the elbows. Now again take two breaths.
4. Now again breath out, raise your trunk vertically supported by your hands till the chest touches your chin.
5. Only the back of your head, your neck, your shoulders, and the back of your arms up to your elbows should rest on the floor. Your arms up to your elbows should rest on the floor. Keep your hands in the middle of your spine. Now take two breaths.
6. Breath out and stretch your legs straight with the toes pointing upwards.
7. Stay in this position for about 5 minutes while breathing evenly.
8. Breath out slowly slide down, release your hands, lie flat on the floor and relax.
Modification
If you cannot do this asana without support, you can use the support of a stool or a chair.
One can also take support of a wall, by placing legs high up on the wall when the back is lifted off the floor.
Shoulder Stand Steps For Advanced Practitioners
1. Lie down flat on your back on the yoga mat.
2. Keep your legs stretched out, tightened at the knees, place your hands by the side of your legs, your palms should face the floor.
3. Now take a few breaths, breathe out slowly and at the same time raise both of your legs together and bring them at a 90-degree angle to your body. Remain in this position for some time while keeping your legs steady.
4. Now breath out and again raise your legs further up by lifting your hips and back from the floor, while gently pressing the palms against the floor.
5. When the entire trunk is raised off the ground, bend your elbows and place your palms on the back of your ribs, resting your elbows properly on the floor.
6. Put the palm pressure and raise your trunk and legs vertically up so that the breast bone presses the chin to make a firm chin lock.
7. You can remain in this pose for about 5 minutes which can be gradually increased to 15 minutes.
8. Release your hands and slide down to the floor, lie flat and relax.
Shoulder Stand Precautions, Contradications And Tips
- Always remember to bring the chest forward to touch your chin and not the other way around where the chin is brought forward towards the chest. If later is done, your spine will not be completely stretched and you will not get full benefits from the asana.
- Only the back of your head, your shoulders, and the upper part of your arms should rest on the floor. The rest of your body should be in a straight line, vertical to the floor.
- In the beginning, the legs area likely to swing out of the perpendicular, the back thigh muscles should be tightened and stretched up vertically to get back in the correct position.
- The elbows must not be placed wider than the shoulders. Try to stretch your shoulders away from the neck and also try to bring your elbows close to each other.
- If your elbows are widened, then the trunk cannot be properly pulled up, also make sure that the neck is straight in the middle resting on the sternum.
- In the beginning, there is a tendency for the neck moving sideways and if it is not corrected it can cause injury or pain in the neck.
- People suffering from high blood pressure should not do this asana unless they can do Halasana and stay in that pose for about 3 minutes or more.
Shoulder Stand Variations / Cycles
1. Do Salamba Sarvangasana
2. Release your hands from the back of the trunk and move them towards the floor. Now the arms should rest fully on the floor, palms facing the floor. The head will be on the one side of the body and the arms will be on the other side of the body (as shown in the above picture).
3. Keep your legs and back straight and steady.
4. You can do this asana for a minute after doing Sarvangasana.
Niralamba Sarvangasana (I)
As ‘alamba’ means ‘support’ ‘niralamba’ means ‘no support’ therefore this asana of sarvangasana cycle means without support. This asana is harder than earlier asanas as the body is not supported by arms.

Technique
1. Do Salamba Sarvangasana
2. Release your hands, bring them over your head, now rest your extended arms on the floor on the same side where your head is placed.
3. Do this asana for about 1 minute.
Niralamba Sarvangasana (II)
This asana is the hardest of all the Sarvangasana poses. In this asana, the spinal vertebrae are fully extended and it helps in achieving perfect Sarvangasana.

Technique
1. Do Salamba Sarvangasana
2. From the earlier pose raise your arms and place your palms on the side of your knees.
3. Stay in this pose for about 1 minute
Conclusion:
The regular practice of all variations of Shoulder Stand (Sarvangasana) movements tones the whole body by increasing blood circulation, which eliminates toxins from the human system. These asanas are more like tonics of the body.
This asana strengthens the spine, shoulders, and neck muscles and is great for runners and athletes. If one practices these asanas regularly it will speed up his recovery from weakness and leads to vitality.
FAQ: Shoulder Stand
Q1. How to do shoulder stand yoga?
Ans: The step by step procedure to do Shoulder Stand is described above in this article for beginners as well as for advanced practitioners.
Q2. Does Shoulder stand improves eyesight?
Ans: Yes! during this pose fresh blood flow through the entire head area which rejuvenate all the organs above neck that includes brain, nose, ears and eyes.
This pose along with ‘Headstand‘ if performed regularly can not only improves eye vision but can also cure all eye disorders.
Q3. Why is shoulder stand good for you?
Ans: This is one of the most beneficial asana for everybody.
This asana is helpful in almost all body ailments that include asthma, bronchitis, Headaches, migraines, insomnia, common cold, other nasal disorders, short temperedness, nervous breakdown, hypertension, diabetes, urinary disorders, uterus displacement, menstrual troubles, hair fall, obesity, piles, hernia etc.
Do share your experience of doing this pose and If you have any questions regarding this pose you can ask in the comment section below.